
Lock Blog
A resource for consumers, locksmiths, and security professionals
A resource for consumers, locksmiths, and security professionals
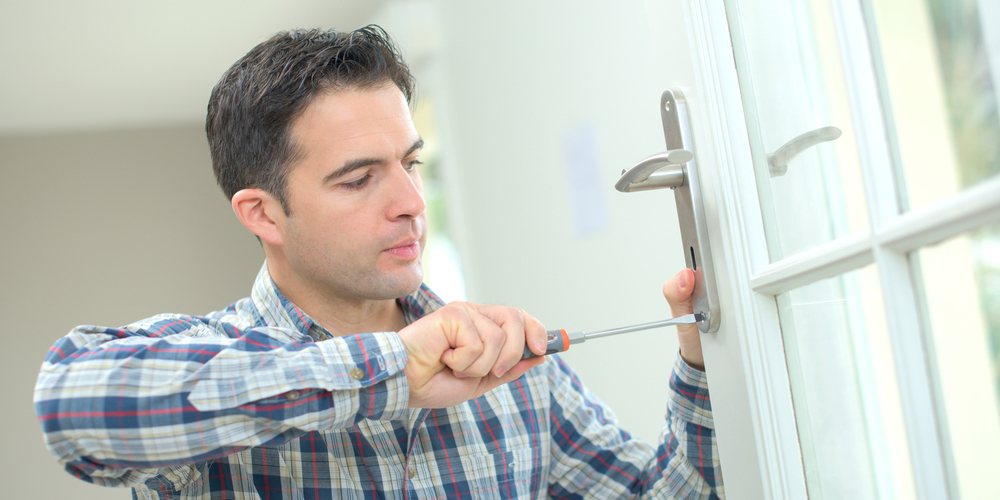
If you are looking to fix door handles, there are several ways to go about it. But before you start, you need to know a few things. These fixes and installation methods are not always the same as basic lock installation. It is important to know what type of door handle you are trying to fix. You need to know what type of fix will solve your particular issue. And you must be sure that you have the training and background for proper servicing and diagnosis. For everything you need to fix a door handle, no matter your skill, just read on.
In order to fix door handles, you must know what type of handle it is. Knowing the type of door handle you are trying to fix allows you to better understand how the mechanisms work. If you do not understand the basics of the handle you are trying to fix, then you risk damaging the handle as well as the door that it is on. To fix door handles, begin by knowing what might be wrong with them and how to go about safely servicing them.
Keyed Door Handle – Keyed door handles are most often found on exterior entryway doors. If the door leads to the outside, there is a good chance it has a keyed cylinder to add more security to the building. If your handle or knob has a keyhole, then it is keyed. Besides how the door knob is controlling the latch bolt, there could also be issues with the lock cylinder breaking or malfunctioning.
Privacy Door Handle – Privacy door handles will not have a keyway. These types of locks will be used on interior doors. There is still likely to be an actuator on the side of the door that leads to the room where privacy is desired. The actuator is likely to be a turning or push button switch. To fix door handles like this, you hardly have to worry about issues with the locking mechanism breaking down.
Simple Turn Handle – These door handles have no intention of delivering privacy or security. They are made only to require a door handle to be twisted in order to access the room. Handles like this will often not even be secured onto a door with through screws. Often the rose plate around the base of the handle, or even the handle itself, will be threaded. This threading allows the knob to be securely fastened without the need for screws. Often these handles will need to be tightened, and in the most extreme cases, the door will need maintenance.
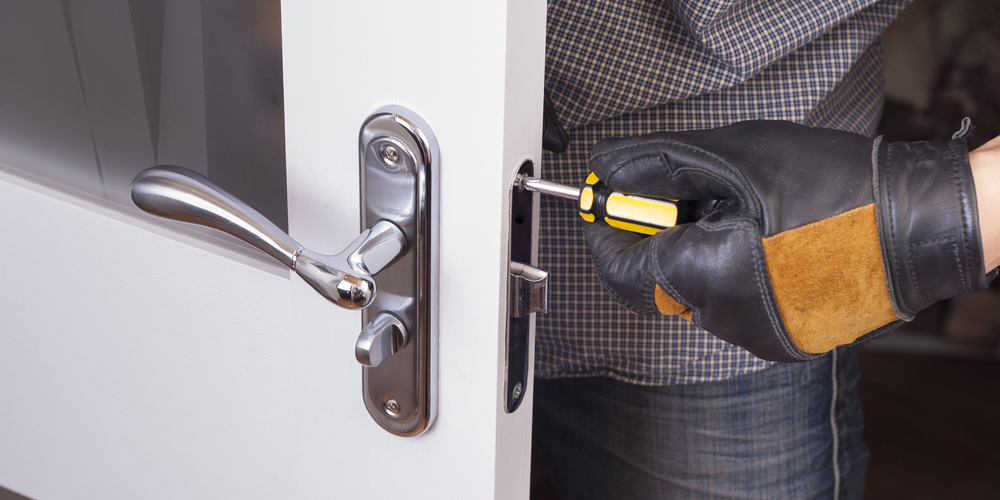
Exposed Fastener Door Handle – When the set screws or another method of a fastener is readily accessible, then this will make most methods to fix door handles simpler. With this style of the door handle, you can always remove the step of exposing the set screws in any process that requires some form of handle disassembly. Sometimes these handles are noticeable because they will have their set screws on full display. Other times they can appear to be concealed fastener door handles, but that is because the fastener is the rose or handle of the door knob.
Concealed Fastener Door Handle – A door handle with a concealed fastener forces whoever is working on the device to remove part of the assembly before having full access to the part of the handle, which is keeping the full assembly in the door. Most often these locks have a rose plate on the interior handle, which is held in place by an Allen screw and/or spring loaded button.
Find out what is being used to secure your rose before you move onto fix door handles. Go to the side of the door that has the turning or push button actuator (this is the interior side/secure side of the handle). If your handle does not have an actuator, chances are the rose or handle is the faster (refer to the “Exposed Fastener Door Handle” section above). If there is a small hole in the handle, often that needs a rose catch tool in order to depress the spring loaded button. The Allen screw needs an Allen key in order to move it out of the way.
Rusted parts in a door handle can lead to many types of mechanical failures. Most often people will seek to fix door handles that are not operating smoothly by removing rust. This is a very recognizable issue because often rust is outwardly visible on the door handle. When something looks old, it is a popular idea to try and fix or replace the device. It is a good strategy, but external rust build up does not always coincide with internal oxidation. This is especially true if the outside of the doorknob has been cleaned without addressing the interior parts of the handle.
Rust is not always the reason for jammed door handles, sticking latch bolts, etc., but if you do see rust, it is best to fix door handles that are affected. All forms of rust on any type of door handle can create complications to functionality, but the largest issues can arise with keyed door handles. When there is a locking mechanism, many of the small internal parts can rust or become jammed due to rust. When you fix door handles that are rusted, be sure to address the smaller components of any locking mechanisms.
Old door handles rarely break completely. Sometimes the part that breaks can be too expensive to replace. Then it makes sense to just get a new door handle, but this is not always the case. Even when it is broken, you may want to hold onto your current door handles for sentimental, historical, or design purposes. Sometimes small pieces within the door handle can fall out, corrode beyond salvaging or simply break. In the case of wanting to fix a vintage or custom door handle, it is still possible to replace the broken piece(s). There is always the possibility to fix door handles by replacing parts. This is even possible for repairing locks.
The most important step in replacement is knowing what part of the door handle needs to be replaced. If it is something small, it may not be that obvious. Components such as springs or parts within a keyed lock cylinder can only be assessed for damage once the lock is taken apart. If you are unfamiliar with the mechanics of your particular lock, it can also be hard to diagnose what is not working, let alone fix door handles experiencing an issue.
To fix door handles that are loose, you may be able to simply tighten the connections that have begun to wane. The looseness of a door handle can be due to the prolonged use of a particular entryway. Every rotation of the handle applies torque to the hardware, to fix door handles that are experiencing excessive torque, you need to refasten them to the same degree the handle has been destabilized.
This is a natural part of a door handle’s lifespan. As long as no parts of the door handle have broken, all you will need to do is tighten the connections that have loosened. The trick will be finding out how the handle is secured to the door. Finding this is the key to fix door handles with this issue. Once you know how the assembly is kept in place, the rest of the process is very simple. For more insight on how the handle is secured, refer to the section above on “Common Door Handle Types”.
The door handle is not always the source of your trouble. Sometimes in order to fix door handles, you need to make adjustments on the door itself. Issues with the door can affect a door handle’s functionality. Everything from latches not locking to sticking door handles can be caused by a problem with the door. Most often the issue with the door is that it is misaligned. Doors naturally misalign as either the foundation of the property, the door, or the door frame, changes.
When doors lose their finish, the weather can cause them to change sizes. A buildup of moisture or even extreme dryness can incrementally affect the wood. Moving foundations can cause the bottom of entry ways to slant, interfering with how the door handles operate. To fix these issues, you can choose to work on the door and reshape it (removing wood until it fits in the doorway). In some cases, you can also adjust the strike plate on the door. Foundation issues should be addressed by a professional, but if the issues is with the deformation of the wooden door or frame, be sure to refinish the wood so that you can reduce the chances of needing to fix door handles in this way again.
The type of work you will have to do can vary quite a bit. It is also very difficult for an untrained eye to make these types of assessments without a bit of trial and error. However, there are a few things to remember when you are trying to fix door handles in this way:
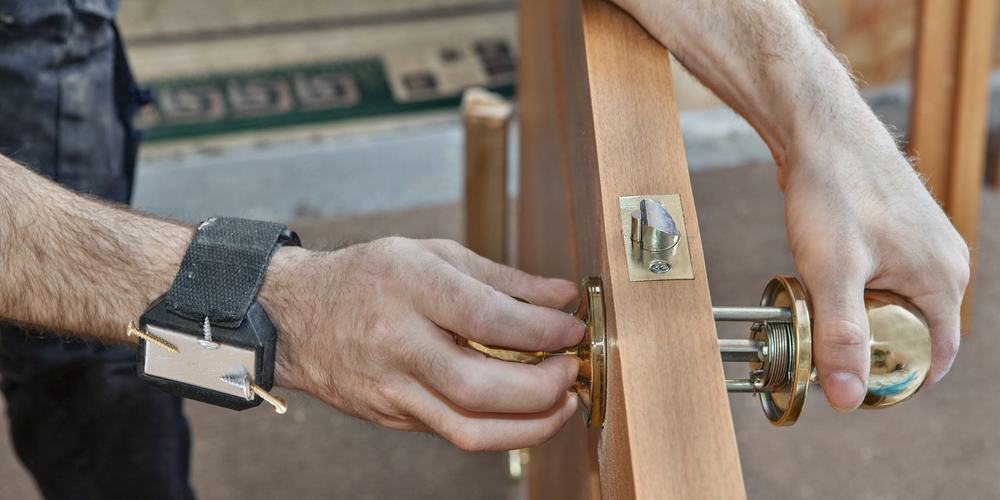
When the assembly is too damaged, you will not be able to fix the door handle with any of the methods mentioned above. A door handle beyond salvaging is mainly determined by one factor: Is the cost to fix a door handle worth the investment? This is an extremely important question because you can keep putting money into anything and continue to make fixes. These fixes may not last very long or they may be extremely expensive. In these cases, it will be best to fix door handles by fully replacing the existing assembly. This may lead to having to change door locks.
The most important consideration for fixing door handles this way is finding a replacement handle that will fit the door. Most residential and commercial doors will have a standard size, which corresponds to the available handles in a given market. You need to find out if you are the exception in your location by taking some simple measurements. If you need to fit the handles into a mortise lock, this is also worth knowing. Not every type of handle will fit with what you already have installed. Before you try to replace anything, make sure you know what you need. Even if you are intending to replace the door, or the current lockset, along with your broken door handle, be aware of what you need for replacements.
If at first, you don’t succeed, hire a professional before you hurt yourself. On a serious note, you should not attempt to do any work that you are not completely comfortable with. With many of these ways to fix door handles, there is not much risk to physical safety, but they are rather difficult to accomplish without the proper training. For an assessment, and even for servicing, it is easier to call a professional home locksmith.
When you choose a locksmith to fix door handles, you are taking all the guess work out of whether the door handle will be fixed properly. If you want to do research on locksmiths, you can learn about how to choose the right locksmith. You might also want to know what to expect when you call a locksmith. All of this research is sure to make you feel as though you are making a more informed decision on who you hire. But if you really want to know you are in good hands you can follow the process below.
With these effective ways to fix door knobs and door handles, you can get your door handles back in working order, no matter your skill level. Don’t forget to troubleshoot all of your issues before deciding on the proper fix for your door handles. And never be afraid to ask for help from the professionals.
Category: How To's, Residential
