
Lock Blog
A resource for consumers, locksmiths, and security professionals
A resource for consumers, locksmiths, and security professionals

We cannot all afford the protection that we need. The best solution is to get the closest approximation to the protection you want. In the case of being at risk of a home invasion, you need a safe place within your home to retreat to once your perimeter security has been breached and your door security has failed. One solution is making your own improvised DIY panic room.
A panic room is there to create a formidable barrier between yourself and a threat within the home. If you have ever seen the movie “Panic Room” starring Jodie Foster and Forest Whitaker, you will have seen the most extreme reason for needing a panic room. Essentially, it protects the homeowners from a threat that has already entered the house.
A panic room is a point of secondary retreat that enables residents to safely hide away while the authorities arrive. But something as complicated as a professionally made and installed panic room might be out of your budget. That is why you need to know about making your own improvised panic room.
For the sake of this article, an “improvised panic room” is going to refer to a safe room that is made in a less than professional way. This will not be about how to make a professional panic room yourself, and instead be about making an effective DIY safe room with simple upgrades most homeowners could do themselves. This focuses on adding and replacing existing parts of a room’s security and not complicated fabrication and home building/designing.
The basic idea is that you can turn one existing room within your home into a fortified safe room. The room can exist and function as normal while having the potential to hold up under the stress of targeted forced entry. However, if you ever get locked out of this panic room it will be more complicated than getting back into a room you locked yourself out of. And that is just how it should be.
You want to plan your panic room around your lifestyle and your concerns. You need your panic room to be quickly accessible from the point in your home that you spend the most time. You want the number of doors leading into the room to be kept to one, and to limit the number of windows (hopefully no windows). A bedroom, or a bathroom within a bedroom, might be a good place to consider.
A door is pivotal to an escape room. It is your way to gain access to safety. But the very nature of a door is that it is meant to be opened. You are looking for them to only be opened by certain people with the required level of access. In the case of interior doors, they are not intended for security, but rather privacy. When you are making a DIY panic room, you need to address the vulnerabilities inherent to any interior doors.
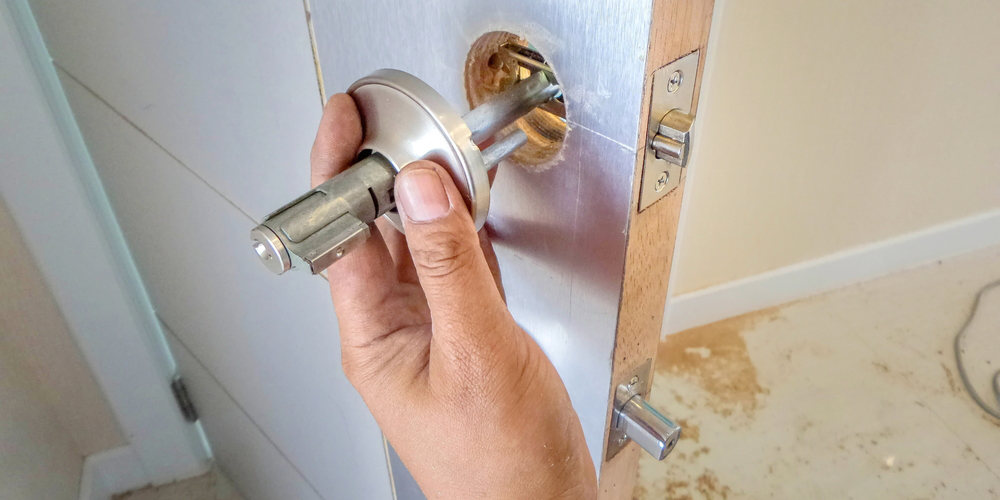
When you are looking into the locks for your DIY panic room, you want to investigate some of the best front door locks available on the market today. The most important thing to look for in the locks for your improvised panic room is strong metal content. All locks can be picked, so it is not all that pressing for you to seek some form of unpickable lock. With that being said, you also do not want to install a lock that just about anyone can bypass.
You can create unnecessary vulnerabilities if you are using the wrong lock for your particular door. The best lock to pair with a door intended for a DIY Panic Room is a double sided deadbolt. We talk about gaps in your door in the “Security Doors” section below, but essentially, you want to avoid thumbturns for deadbolts. You can leave your key inside the deadbolt on the interior side of the door, but you should remove it after you have engaged the lock.
There is only so much force that your deadbolt can withstand, but before your interior door lock is likely to be attacked, the door itself will need to hold up under pressure. You want a nice solid core door or a door that utilizes an iron or steel core. This will be different than a standard hollow core door, which is the go to for all interior doors. You need hard material in your DIY panic room door so that it will not be destroyed by battering rams or kicking attacks. And it should be tight against the door frame so tools cannot be inserted into any gaps.
Also be aware of the holes that are cut in your door, as different lock types require a door to be cut a certain way. If the security door you buy is built for a standard deadbolt, but you want to use a mortise lock, then you need to factor in having the door changed into your cost of changing locks. And in the same vein, using a standard deadbolt on a door built for a mortise lock body will leave too much empty space in the door and weaken it.
There are certain things that you can add to a door that increases the security. And when you are looking to make an improvised DIY panic room, these additions are sure up some likely weaknesses in your door. There are many ways to secure a door, but when it comes to a DIY panic room door, there are three places you want to secure. These are your hinges, your strike plate, and your hardware. As I have talked about many times, hinges and strike plates can be improved by using longer set screws (3-inches), but for a DIY panic room, you should use hardier strike and hinge protection for your door.
To protect the parts of the door that have had material removed to install your locks, you can use metal slipcover for locks. Even if you have multiple locks, you can use larger door hardware reinforcers. From there, you can use barricades that secure the door from the inside. These could be metal bars that secure along the center of the door, under the door handle props or just simple door stops. These should be used after the door has been locked, but stored in the room to increase its security once the panic room is shut.
Ideally, a panic room, especially an improvised DIY panic room, should not have windows. If you can convert a windowless bathroom (that uses a good ventilation system) into a panic room, it would be more ideal than a bedroom with bay window. However, when it comes to a DIY panic room, you have to work with what you have. If you have a window on one of the walls of your planned improvised panic room, there are still a few solutions for you. None of these things will be as good as a wall, but they better than nothing.
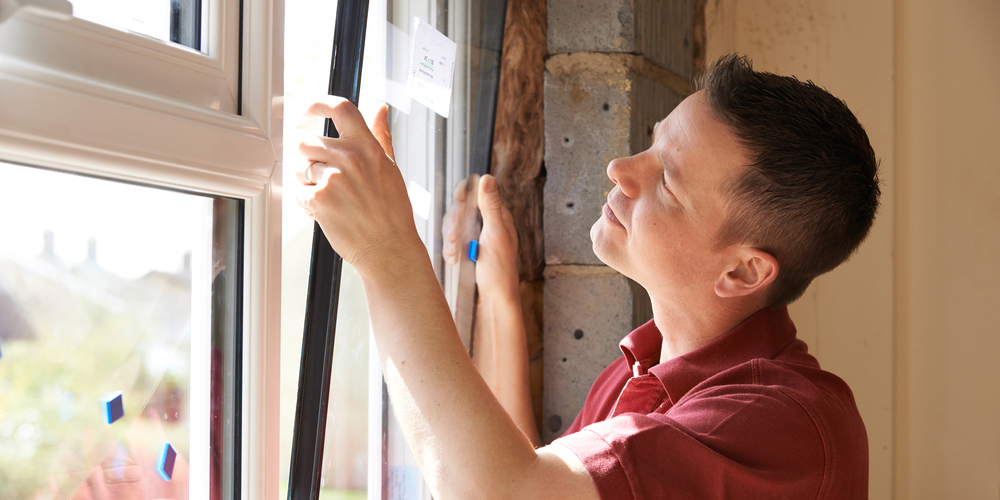
If you want to keep your improvised panic room low profile, you will not go straight to barring your windows. Something like window security film is a great option for this. It does not so much keep your window from being damaged as it prevents the glass from being fully compromised. Depending on the quality of the film, criminals might give up before fully breaking this boundary.
You can install this type of film on any type of existing window. These come in sheets the adhere to the glass. You will need to fit the sheets to your existing pane, but this can be done by individuals with fairly limited DIY skills. But even with window film, the glass is likely to be penetrated. After penetration, say from a bullet, the glass will not shatter entirely, but there will be a perforation.
When you are looking to secure your windows, the most obvious solution is to use metal bars. Metal bars are certainly better than nothing, but they give themselves away. If you are being targeted, someone is likely going to bring an angle grinder to get through your barred windows. If you bar the windows on a single room (such as your DIY panic room), then it telegraphs the importance of that room. When you have more obvious security on one certain part of your house, criminals are likely to believe that is where the valuables are stored.
That being said, metal slats, bars, etc., will keep people from simply striking the window and coming in through the opening. You can also keep your windows open on hot days without having to worry about someone easily overcoming this part of your security. You can even use bars over security film to restrict the severity of impacts. Bars will limit how much of surface area can be impacted while trying to strike the glass.
No matter what type of opening is made in the glass, whether it is a small puncture or a complete removal of the glass, someone will be able to get at your window locks. First of all, you should be sure that your window locks are fully functional. Then you have to check that your window lock cannot be bypassed from the outside because then the protections on the glass will not matter.

Any panic room is only a temporary measure. Eventually, someone can overcome the security and get inside. All security can be overcome given enough time, and an improvised panic room will, of course, not give you much of a buffer as a professionally made panic room. That is why an improvised escape room needs to have certain things that make waiting more bearable.
Once you are safe inside your improvised panic room, you need to call for help. This is best done with a phone. Cell phones in the United States can make emergency calls without having an active account or plan for that number. All that you need is a phone that is charged and has a signal. You should choose a room in your home for a DIY panic room that has a strong signal.
A land line is not always the best option, especially if you are looking to have security during a power outage. You might be concerned about the phone lines being cut or someone trying to prevent you from calling for assistance, for those reasons, having a cell phone gives you some better peace of mind. You can have your phone constantly charging/plugged in, and it should never leave the improvised panic room. You need to be able to rely on that phone.
Emergency response can take a while, so if you can have a way of making a lot of noise, you can attract the attention of bystanders. This does not need to be a monitored security system, necessarily. The alarm should be alarming, and you should have to manually flip the switch when you are in your panic room. For your own protection, at least have some ear plugs inside the improvised panic room if you cannot soundproof the room.
The louder the alarm, the better. Such a sound will not only make the criminals outside of your panic room worried about discovery and intervention, it will also make it generally difficult to stay inside the home. You want whoever is inside the home to leave. Fortifications can only last so long, so one of the most important things you can do with an improvised escape room is incentivize criminals to abandon their pursuit.
It is important that you are able to defend yourself in case some part of the improvised panic room fails. Even if someone cannot get inside entirely, fighting back always discourages attackers. When you fight back from with protection (even from a position of semi-protection), you are in a better position to defend yourself with reciprocal force.
This is not to say that you need to use a firearm for personal protection, but you should have a weapon that you are trained with. If you are not competent and comfortable with your personal protection device, then it is not likely to be used effectively. Even if you have pepper spray, it is better than nothing. While waiting for assistance you do not want to be helpless.
There are some additions to your DIY panic room that go beyond simple and absolutely necessary, but they might be a good idea depending on your level of risk. In terms of setting up some of these security measures, you might need to put a little more thought into whether or not you should be the one upgrading your own home security.
If you are really looking to be able to stay in the improvised panic room for a long time, you need to make sure more than just your doors and windows are secured. When a door won’t break open and the window is not smashing in, an industrious attacker will try to break clean through the wall. This is an important reason why you should use double sided deadbolts because even if a person can reach through the hole in the wall, they will not be able to open the lock. But by strengthening your walls you might affect your ability to call out, link with the internet modems, etc.
You can use metal inserts or concrete to strengthen walls, but it is tricky. Compare this to when you are looking at bulletproofing a car the cheap way, you sacrifice the functionality of the doors that you fill with a harder material. If you are going to try and utilize concrete walls, understand that with an improvised DIY panic room, you are likely to want the walls to have pipes and electrical. The reason for this complexity is that you are now messing with foundational elements of your home. You might need building permits for something like this.
Obscurity is good for security. If you have a room that is out of the way, you can try obscuring the entryway to the room. This makes it so you are not likely to be discovered. However, you should not rely on a panic room as a hiding space. At the end of the day, a panic room, DIY or not, needs to be able to stand up to abuse when you are discovered. If all you are doing is making a good hiding spot, this is not a panic room.
Just like there are certain places to never hide your house keys, there are locations within your house that someone is going to think to look for a hiding place. Do not make your panic room location obvious no matter what. As I have already mentioned in the section about window security, people should not be alerted from outside that there is an abnormality in your security. Be careful about hidden entry ways that require you to move things out of the way or use codes to open, as this will make it so you need more time to find safety during an emergency.
A great addition to a panic room is having some way to view what the people outside your panic room are up to. When you lock yourself inside any type of panic room, the safety you are attaining comes from shutting yourself off from anything happening outside of that room. But in doing so, you cannot anticipate the dangers that are regrouping outside. If you look into getting some of the best security cameras that work with smartphones, you will be able to better anticipate the outside threats as they attempt to break in.
When you get a camera that can link to a smartphone, then you do not need a monitor set up in your panic room already. In the case of improvised panic rooms, you are going to be using this room for things other than a panic room, so having it look the Bat Cave might not be an option. It is cheaper and more efficient to have a simple camera set up for this purpose. If you can see what people are doing to get inside, you can coordinate with the authorities who you have on the phone or better use your personal protection devices.
The thing to remember is to keep your expectations as reasonable as your budget. You might not be able to do everything on this list, but the more you do, the better protected you can be. Replace and add to what you already have and you will keep the required skill and investment level low for your DIY panic room. Always try your best to stay safe.
Category: How To's, Residential, Safety & Security
